
To change the Admin Password, you will need a Console cable (USB to Ethernet).
1. Plug the Ethernet side into the Console port on the Fortigate Firewall and the USB side to your workstation.
2. On your workstation, open the Device Manager under Control Panel to see which COM port shows up. In our example, the console cable was assigned COM3.

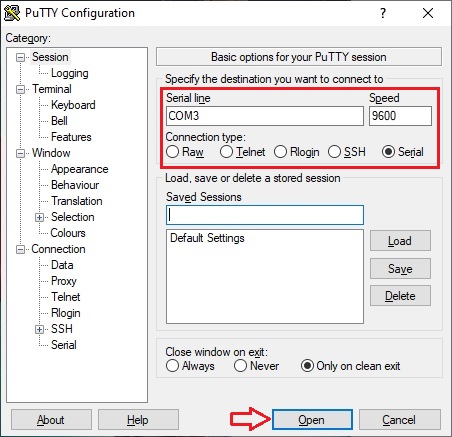
3. Now open Putty (you can download it for free from Putty.org). Set the Connection type to “Serial”, enter the COM port from Step #2 into the Serial line and set the Speed to 9600 and click OPEN.
4. Go ahead and power cycle the Fortigate Firewall (unplug then plug it back in) and you should see the boot sequence through the Putty system. We do this because the maintenance account is active for only 60 seconds after a fresh boot, which we’ll use to reset the admin account. You should see the Model and Serial Number of the device during boot. Write the SN down (or copy from the label on the back of the device).

5. It may take several minutes for it to finish booting. When it does, enter maintainer as the username. Then for the password, enter bcpbFGT50E5xxxxxxxxx (bcpb + YOUR full Serial Number). If everything is happy, you should see the “Welcome !” message. Now type in “config system admin” and hit enter. Then type “edit admin” and hit enter. Then type “set password <password you want>” and hit enter. Then finally, type “end” and hit enter. And that should be it.

6. Now you can disconnect the Console Cable and login to the webadmin page for the Fortigate and your new password should be working.

Again, these are just our summary notes for some changes. This article is not meant to serve as an official Fortinet tutorial or configuration instruction.