
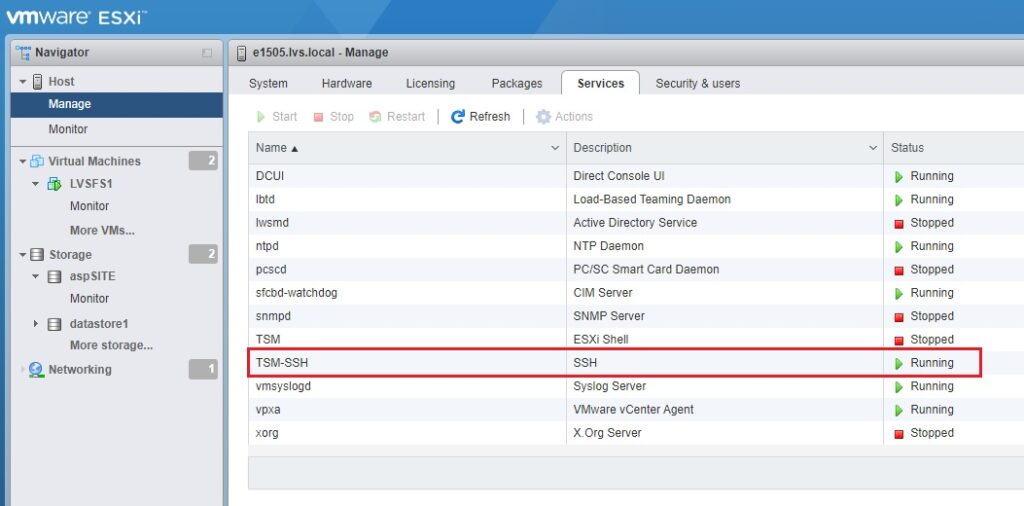
1. You will first need to enable SSH on the VMWare server. In our example, we are using VMware ESXi running 6.7. It is located under Manage > Services Tab.
2. Here are the instructions for shrinking a VMDK. It’s for ESXi 5.1 but still worked on our newer 6.7 setup. One thing to note, even if you turn off your VM and go into settings for that VM, it may show that you can modify the hard disk field. You cannot shrink it here.
The main basic steps are – A) You need to go into the Windows OS and shrink the partition there first, and then B) Shrink the VM in SSH following the instructions below.
Shrinking Disk on the Guest OS first – Open Computer Management > Disk Management. Select the Volume, click Shrink Volume, then enter the new reduced value. In our example, we were going from 850GB to 750GB. That means our new size was 767384 (749.39 x 1024)

Follow the rest of the instructions in the link above to change the VMDK info in SSH to the new matching value.
NOTE: Once you have changed the size of the VM in the Guest OS (Windows here) and the VMWare datastore via SSH, you will need to modify the “Provisioned Space”. To do this, your VM must be THIN, not THICK. If the VM is THICK, you will need to convert it to THIN first. This means it must make a full-sized copy of the existing VM, so make sure you have enough storage space.
Convert THICK to THIN – https://www.alitajran.com/convert-thick-provisioned-disk-to-thin-on-vmware-esxi/
Reclaiming disk space from THIN provisioned VMDK files on ESXi – https://kb.vmware.com/s/article/2136514
To check for THICK or THIN provisioning, click “Edit Settings” on your VM and expand the Hard Disk Section

Again, these are just our summary notes for some changes. This article is not meant to serve as an official Sonicwall tutorial or configuration instruction.